Home Recording Studio Essentials
The past decade has seen an explosion in home recording studios. Thanks to technological advances, a lot of artists are now bypassing expensive professional studios to record their masterpieces in the bedroom.
With the equipment required to record becoming a lot more affordable, just about anyone can record a hit song or podcast from home. We recently tracked down a number of industry experts, musicians, and podcasters to ask one simple question – just what are the essential tools for a home recording studio.
The first one is obvious – a computer. If you’re reading this, chances are you already own one. This might just be the most expensive piece of equipment you’ll need so you’re already well on your way. Whether you have a desktop computer or a laptop, either one will do the job. The newer it is and the more processing power it has, the faster it will be able to process the software you’ll be running on it. Which brings us up to the next thing you’ll need – software.
The main software required to record and then touch up your recordings is the Digital Audio Workstation (DAW). There has been endless debate on what the best DAW is but there’s no definitive answer here. The best one is the one you feel most comfortable using. Some have a steep learning curve and will require some serious hours behind the screen but the end result will certainly be rewarding. Pro Tools is one of the most popular DAWs and can be found in just about every professional studio. However there are a number of other DAWs that give it a run for its money including Logic Pro, Ableton Live, FL Studio, Sonar, Reaper, and Cubase.
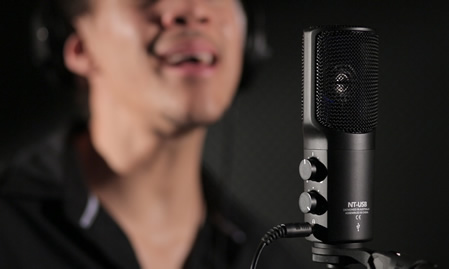
If you’re a singer or podcaster, you’ll also be needing a microphone. For recording vocals, the two main types are condenser mics and dynamic mics. Condenser microphones exhibit a higher sensitivity than dynamic microphones and are therefore most suitable when recording vocals. But which microphone do you buy? If you’re podcasting or recording semi-professionally, a simple plug-and-play USB mic might be all you need. Some of the most popular are the Audio Technica AT2020USB+, Rode NT-USB, and Blue Microphones Yeti. But for a more professional sound, you’ll be wanting a mic that uses 48v phantom power. Unless you have a few spare thousand to splash out on a Neumann, you’ll do fine picking up either a Rode NT1, Audio Technica AT2035, Shure SM-27-LC, AKG C3000, or MXL 770.
If you purchase a mic that requires 48v phantom power, then you’ll also be needing an audio interface. The interface bypasses the computer’s sub-par sound card and will give you a professional sounding recording. If you’re a one-person show, the Focusrite Scarlett Solo, Steinberg UR12, or PreSonus AudioBox will all do the job. An XLR cable to connect your mic to the audio interface would also be needed. If you can afford it, a premium cable from the Mogami brand is highly recommended but any cable above $20 should do the trick.
Once you have these essentials, you can then start looking at some of the other accessories which you might like to add including headphones, studio monitors, microphone stands, and pop filters. The room you’re recording in is also of vital importance. Ideally, you’d be recording in a room that has been acoustically treated using bass traps and acoustic panels. But if you’re on a budget and want to avoid having to treat the entire room, you could pick up a reflection filter (such as the ones manufactured by sE Electronics). And if you’re on an extremely tight budget, you can create your own vocal booth with blankets you have lying around at home.
We have only scratched the surface here but we would consider these to be the bare essentials when setting up a recording studio at home. Once you arm yourself with these basic tools, you will be well on your way to conquering the world.


